

TestFlight and the App Store
DevBench follows each build through TestFlight, App Review and the App Store. It doesn’t sign in to App Store Connect or upload anything: you take each step as usual, then record it in DevBench in one tap, or a connected coding agent records it for you.
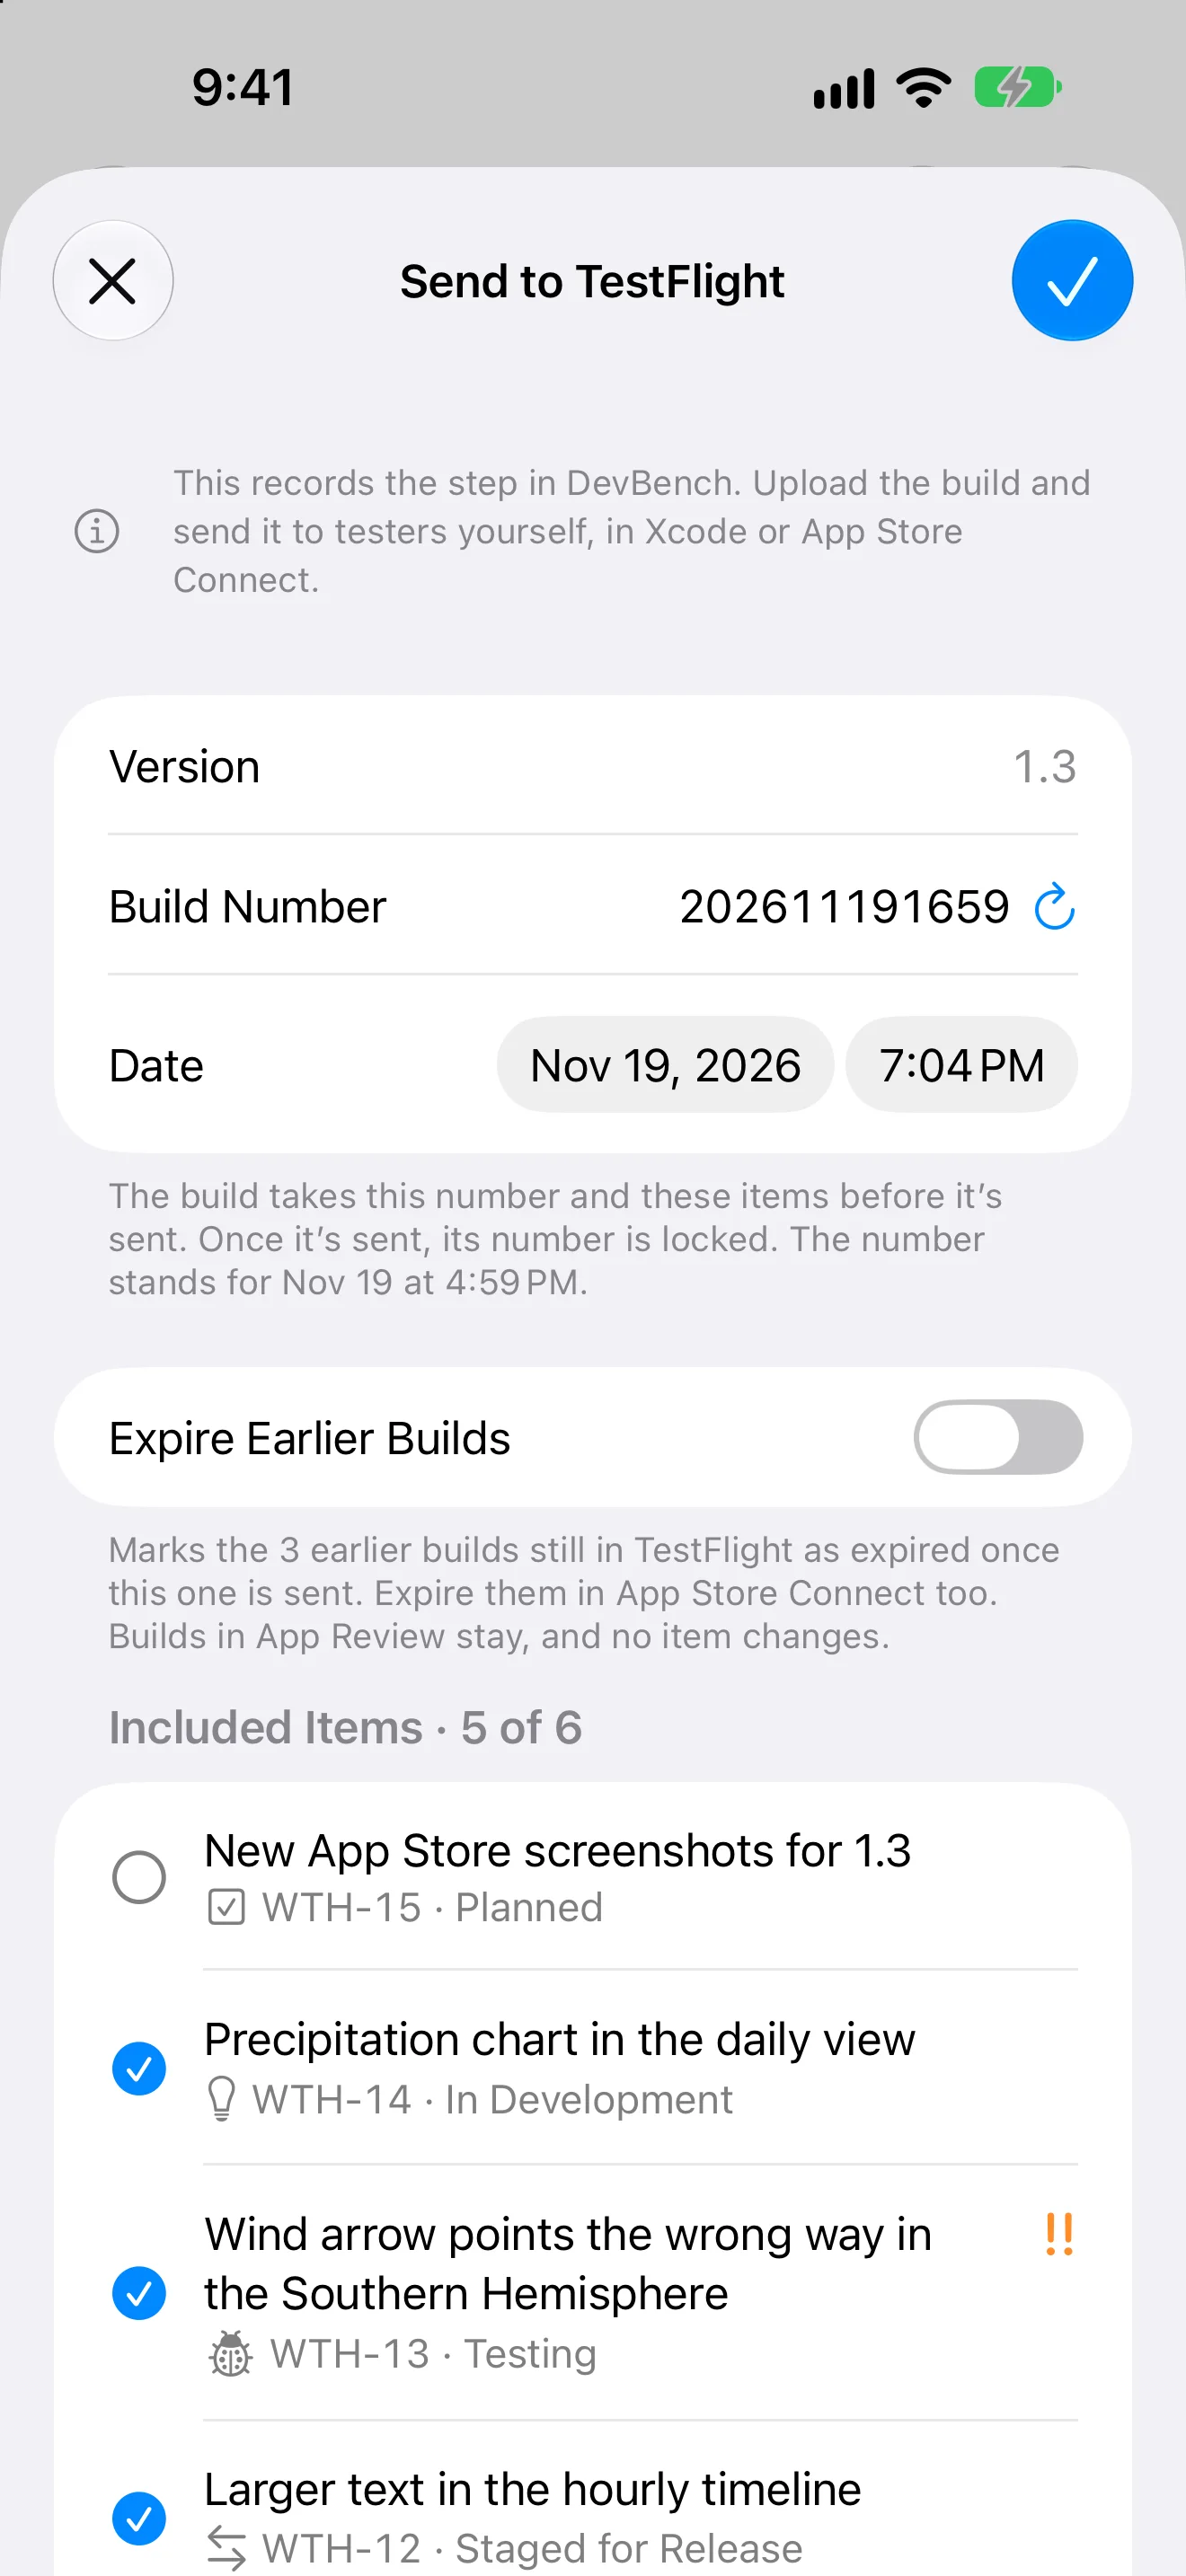
Send a build to TestFlight
- Upload the build and send it to testers in Xcode or App Store Connect, as usual.
- On the app’s Overview, choose Send to TestFlight…
- Check the build number and the items in the build. Use Current Time or Use Next Number fills in a build number.
- Write What to Test for your testers. The count shows how close you are to TestFlight’s limit.
- Turn on Expire Earlier Builds if this build replaces the ones testers have now. Expire them in App Store Connect too.
- Choose Send. DevBench records the step, and the build’s items move to In TestFlight.
- The build takes this number and these items as it’s sent. Once it’s sent, its number is locked.
- What to Test starts from the app’s What to Test template, filled in with the build’s items.
- TestFlight builds stop working 90 days after they’re sent. Each build in DevBench shows how many days it has left.
- For an app that doesn’t use TestFlight, turn off Uses TestFlight in App Info ▸ General. Its builds then go straight to App Review.
Manage builds in TestFlight
A build that’s in TestFlight has these moves on its page and under More in the pipeline. None of them change the build’s items.
- Mark as Replaced
- Records that a newer build took this one’s place. Testers can still install it until it expires.
- Expire from TestFlight
- Records that you expired the build in App Store Connect, so testers can’t install it.
- Expire Earlier Builds
- Marks every build still in TestFlight except the newest as expired. Expire them in App Store Connect too. Builds in App Review stay.
- Undo Send to TestFlight
- For a build recorded as sent by mistake. Clears its TestFlight history, as if it was never sent.
Submit for review
- Submit the build for review in App Store Connect, as usual.
- In DevBench, choose Submit for Review…
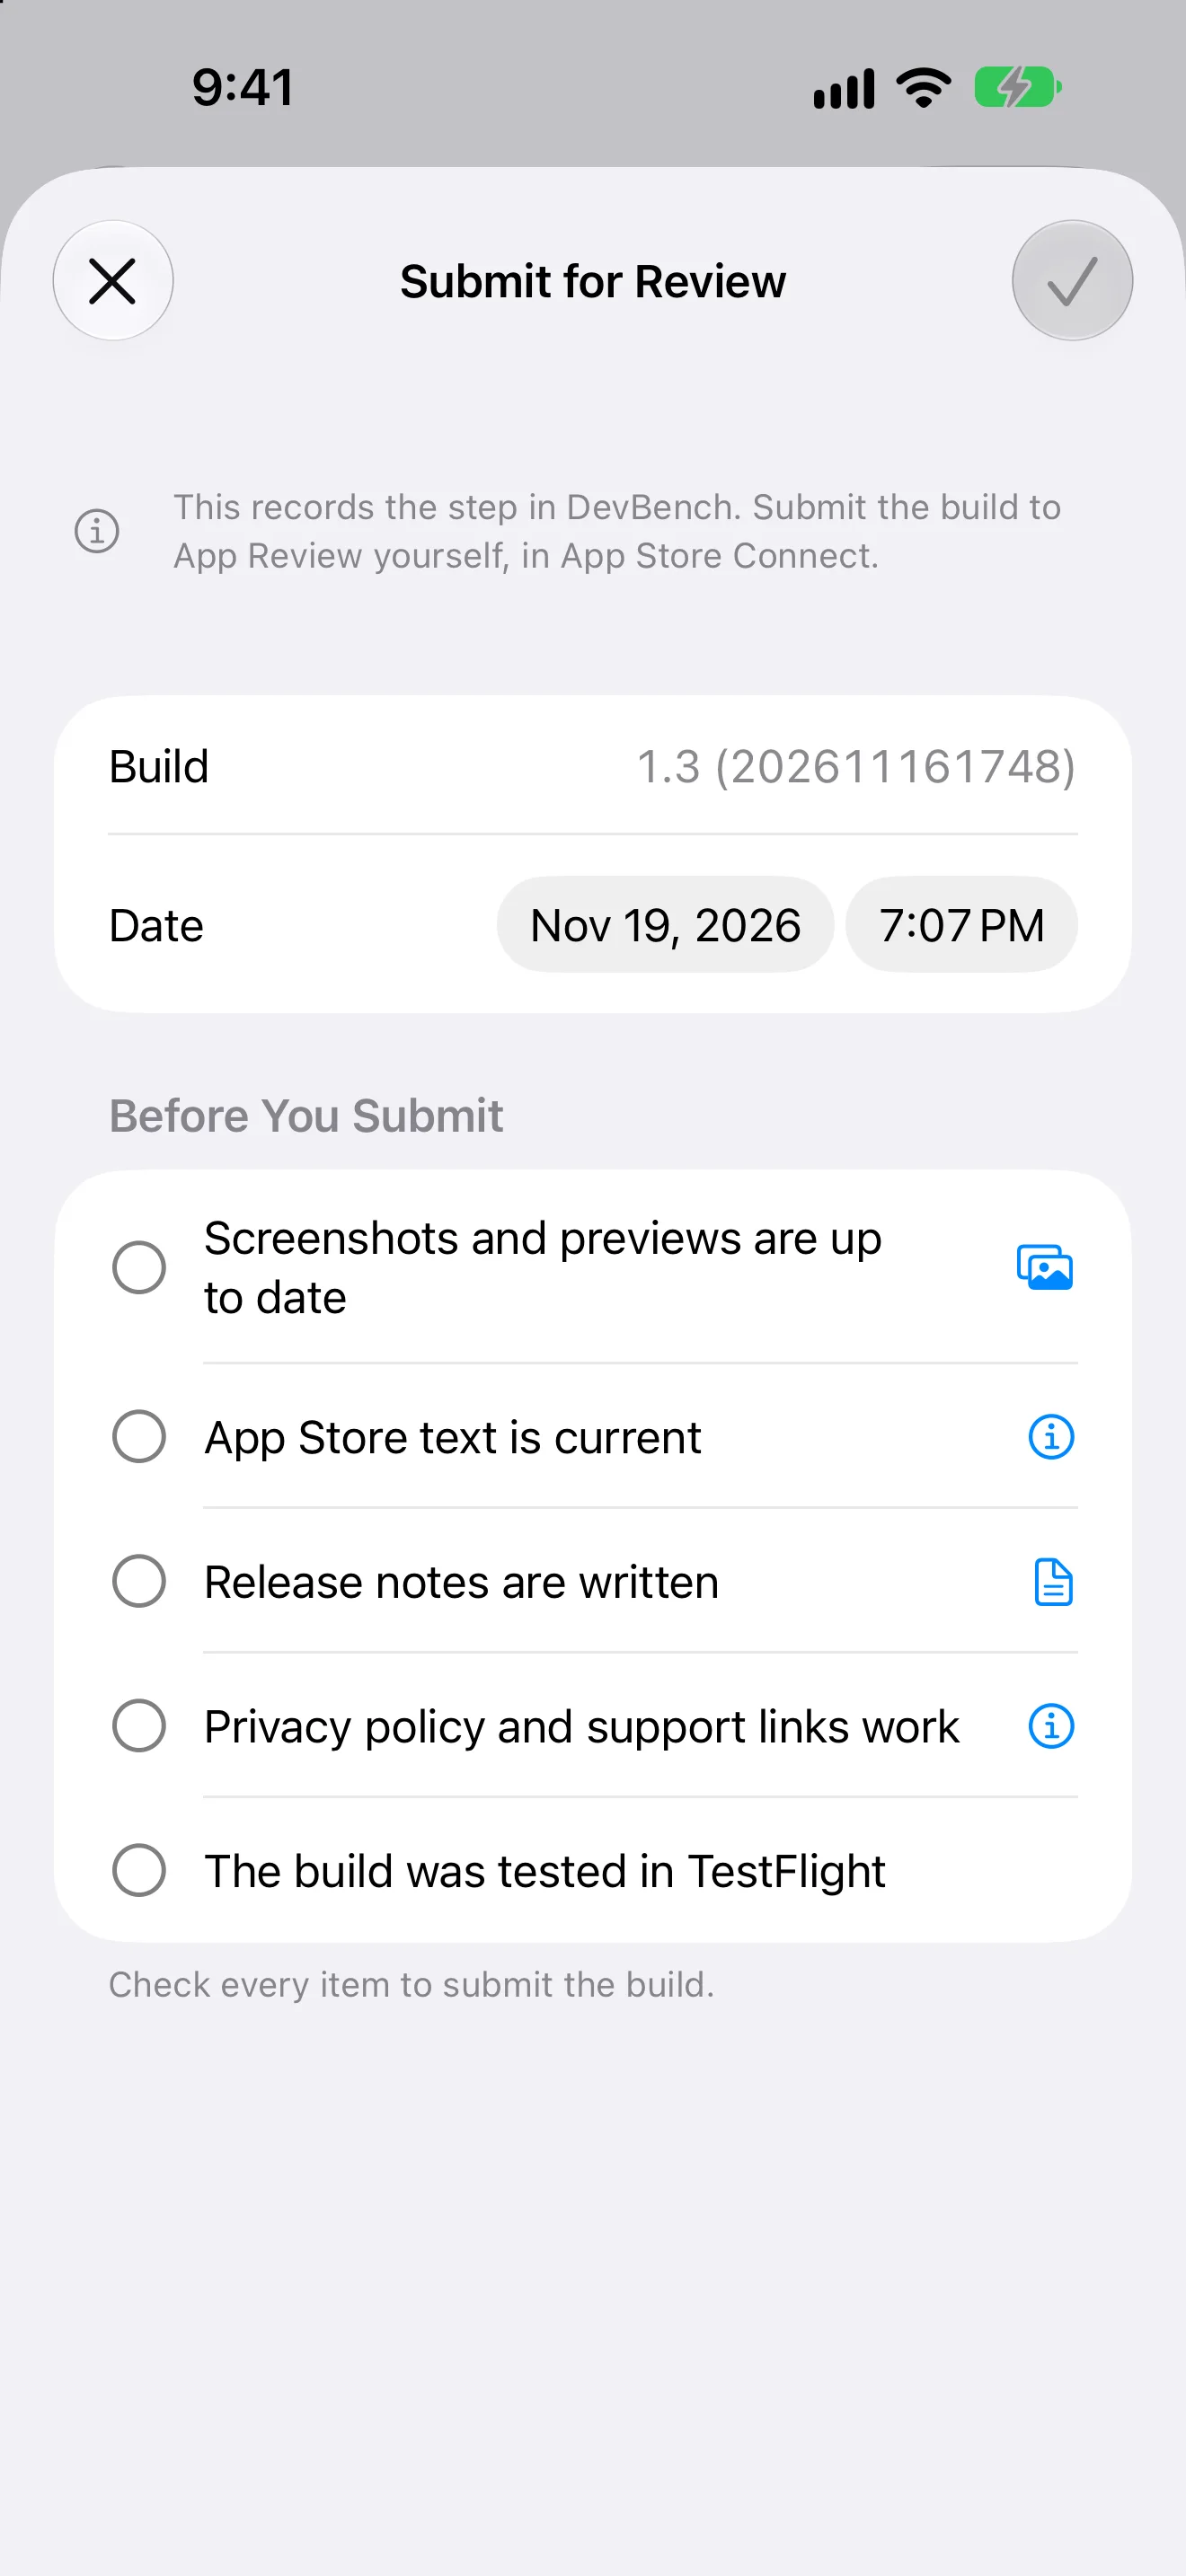
- Check off each item under Before You Submit. Submit stays off until everything is checked.
- Choose Submit. DevBench records the step, and the build’s items move to In Review.
Your submission checklist
Edit the list in App Info ▸ Submission Checklist. Every app starts with five checks.
- Screenshots and previews are up to date.
- App Store text is current.
- Release notes are written.
- Privacy policy and support links work.
- The build was tested in TestFlight. For an app that doesn’t use TestFlight, this one reads “The build was tested on a device.”
Change the checklist
- An item can open the page it’s about: App Info, Release Notes, Release History or Brand Assets.
- Use Default puts the original list back.
- If you remove every item, builds are submitted without a checklist.
When App Review approves a build
Choose Mark Approved. The build shows as approved and ready to release, and the next move becomes Release…
If App Review rejects a build
- Open the build and choose Mark Rejected…
- Paste App Review’s message into Reason, so it’s at hand while you fix the issue or reply.
- Choose Mark Rejected. The build’s items go back to In TestFlight, or to Staged for Release if the build isn’t in TestFlight.
- The message stays on the build’s page under Rejection Reason.
Take a build out of review
If you withdraw a submission in App Store Connect, choose Remove from Review in DevBench. The build’s In Review items go back to In TestFlight, or to Staged for Release if the build isn’t in TestFlight.
Release on the App Store
- Release the version in App Store Connect, as usual.
- In DevBench, choose Release…
- Set the release date and check the release notes. They’re saved as the version’s final notes, and must fit the App Store’s 4,000-character limit.
- Choose where unfinished items go: the next version, a new version or the backlog. Or choose Don’t Move.
- Choose Release. Finished items, from Testing on, become Released.
- The version is marked Released and locked as it shipped. Choose Edit on its page if you need to change it.
App Store text
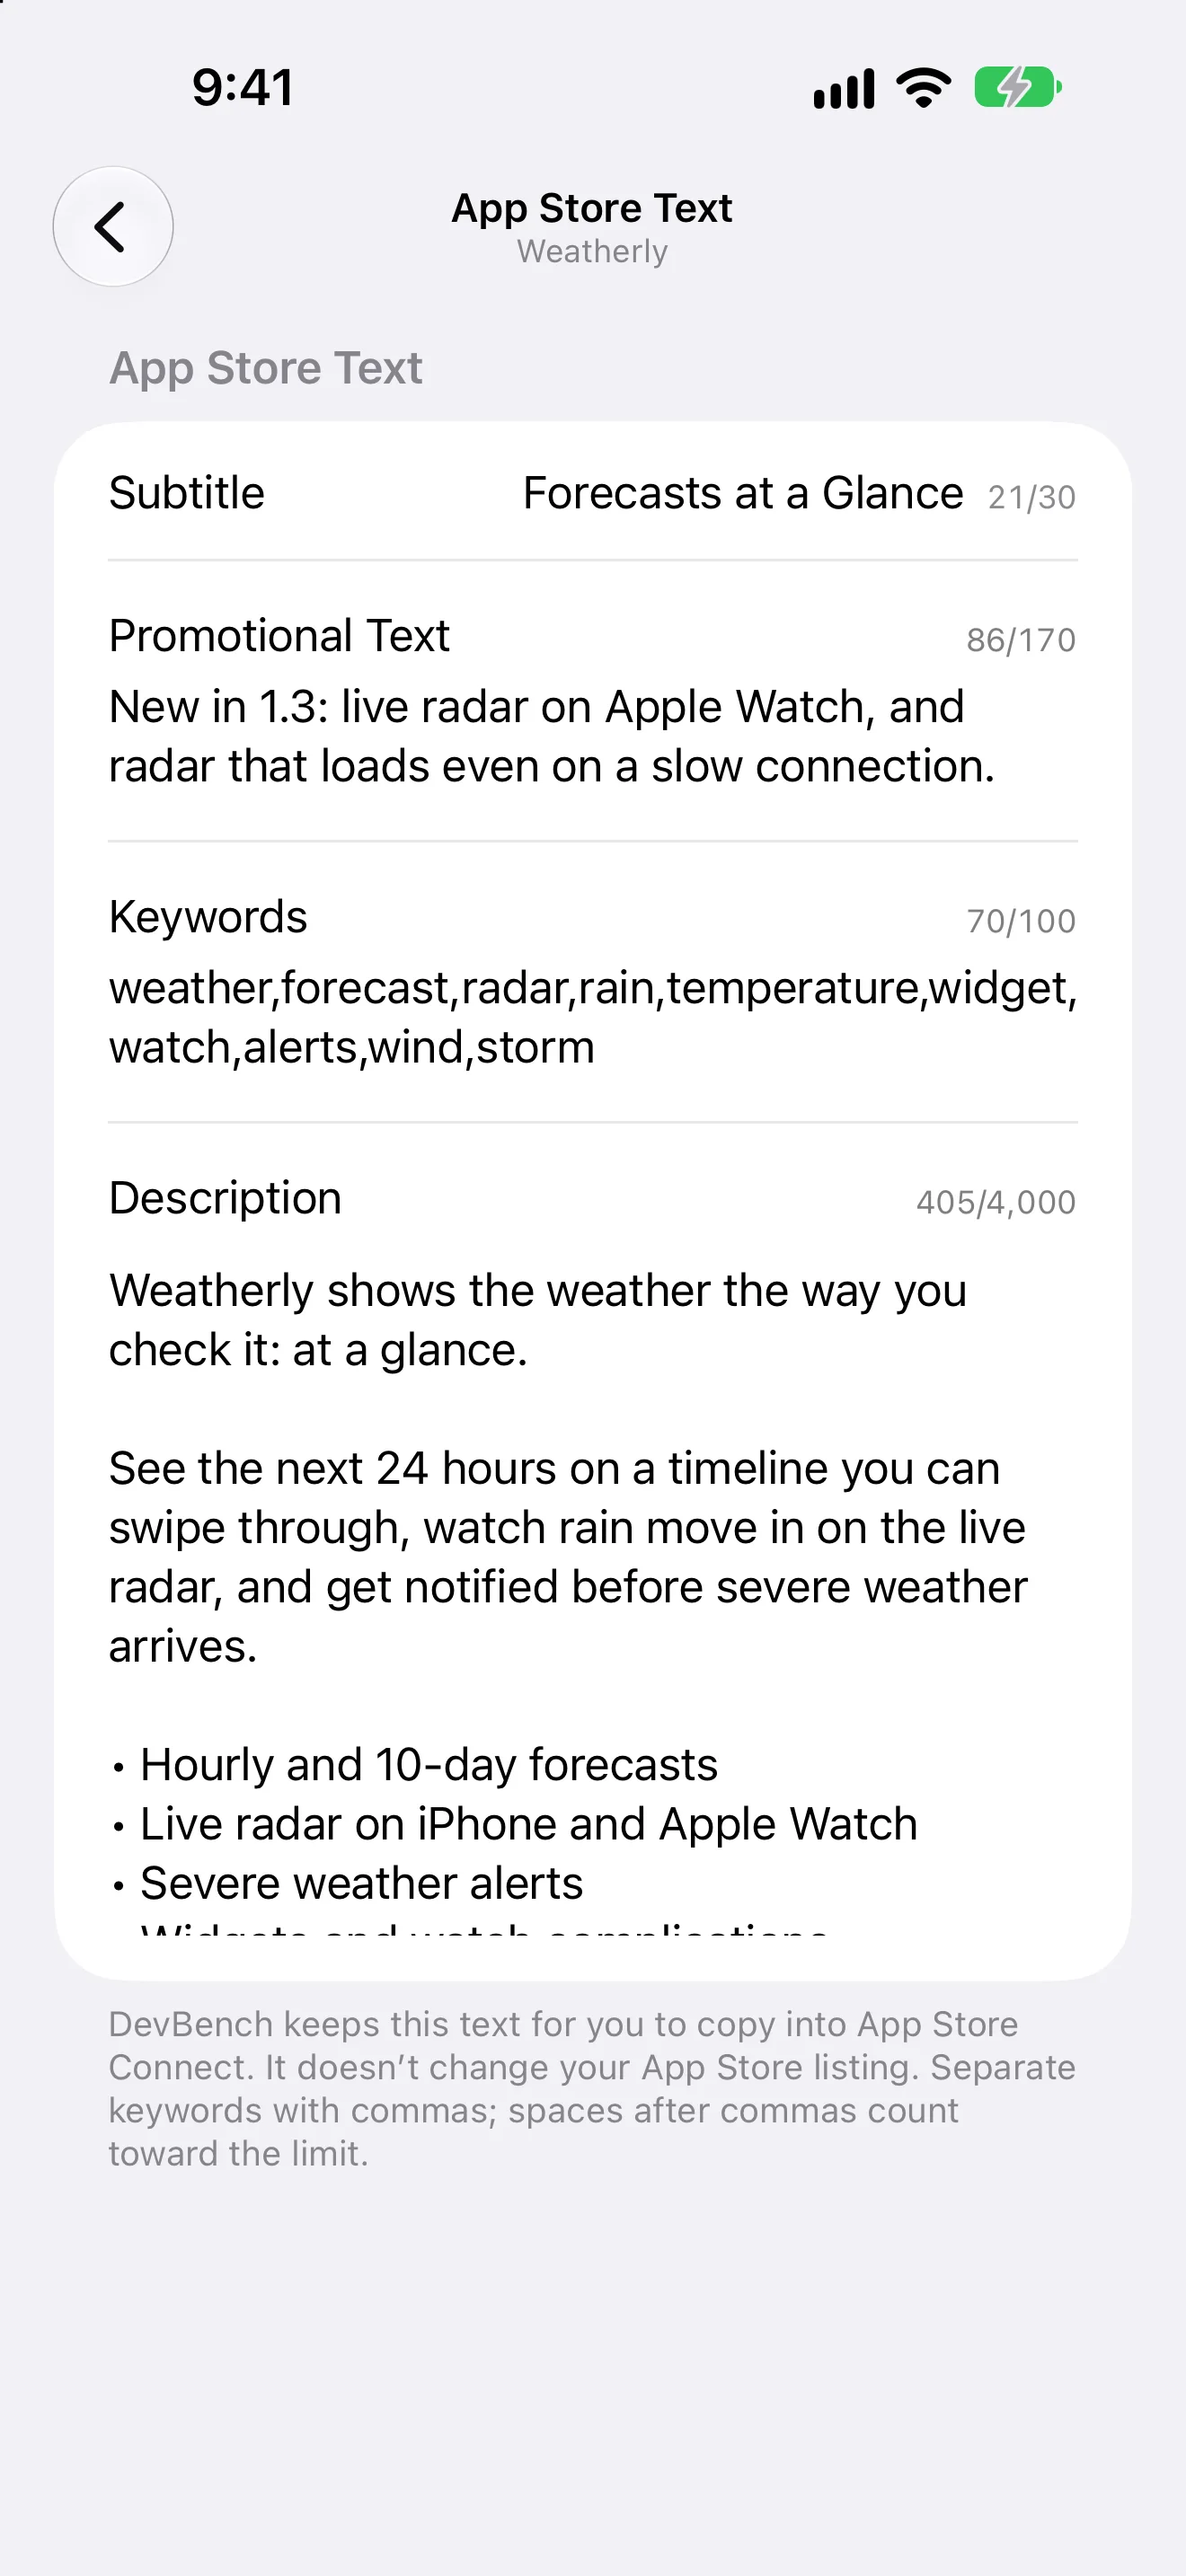
App Info ▸ App Store Text keeps the text you copy into App Store Connect, each with a live count. It doesn’t change your App Store listing.
- Subtitle
- 30 characters.
- Promotional Text
- 170 characters.
- Keywords
- 100 characters. Separate keywords with commas. Spaces after commas count toward the limit.
- Description
- 4,000 characters.
- The app’s name, in App Info ▸ General, is counted against the App Store’s 30-character limit too.
Undo a move
Every release move can be undone right away with Undo. Later, open the build and delete the event from its History, or change its date. The build’s stage follows its most recent event.