

Items
An item is one thing to fix or build: a bug, an idea, a change or a task. Each has an ID, a status and a priority, and can carry notes, a checklist, attachments, a branch, a release note and a record of how it was fixed.
Types
An item’s type says what it is, and decides which heading it appears under in release notes.
- Bug
- Something broken, such as a crash or a view that looks wrong. Listed under Bug Fixes.
- Idea
- A feature to build someday. Listed under New Features.
- Change
- An improvement to something that already works. Listed under Improvements.
- Task
- Other work, such as updating screenshots or answering a review. Listed under Other Changes.
Statuses
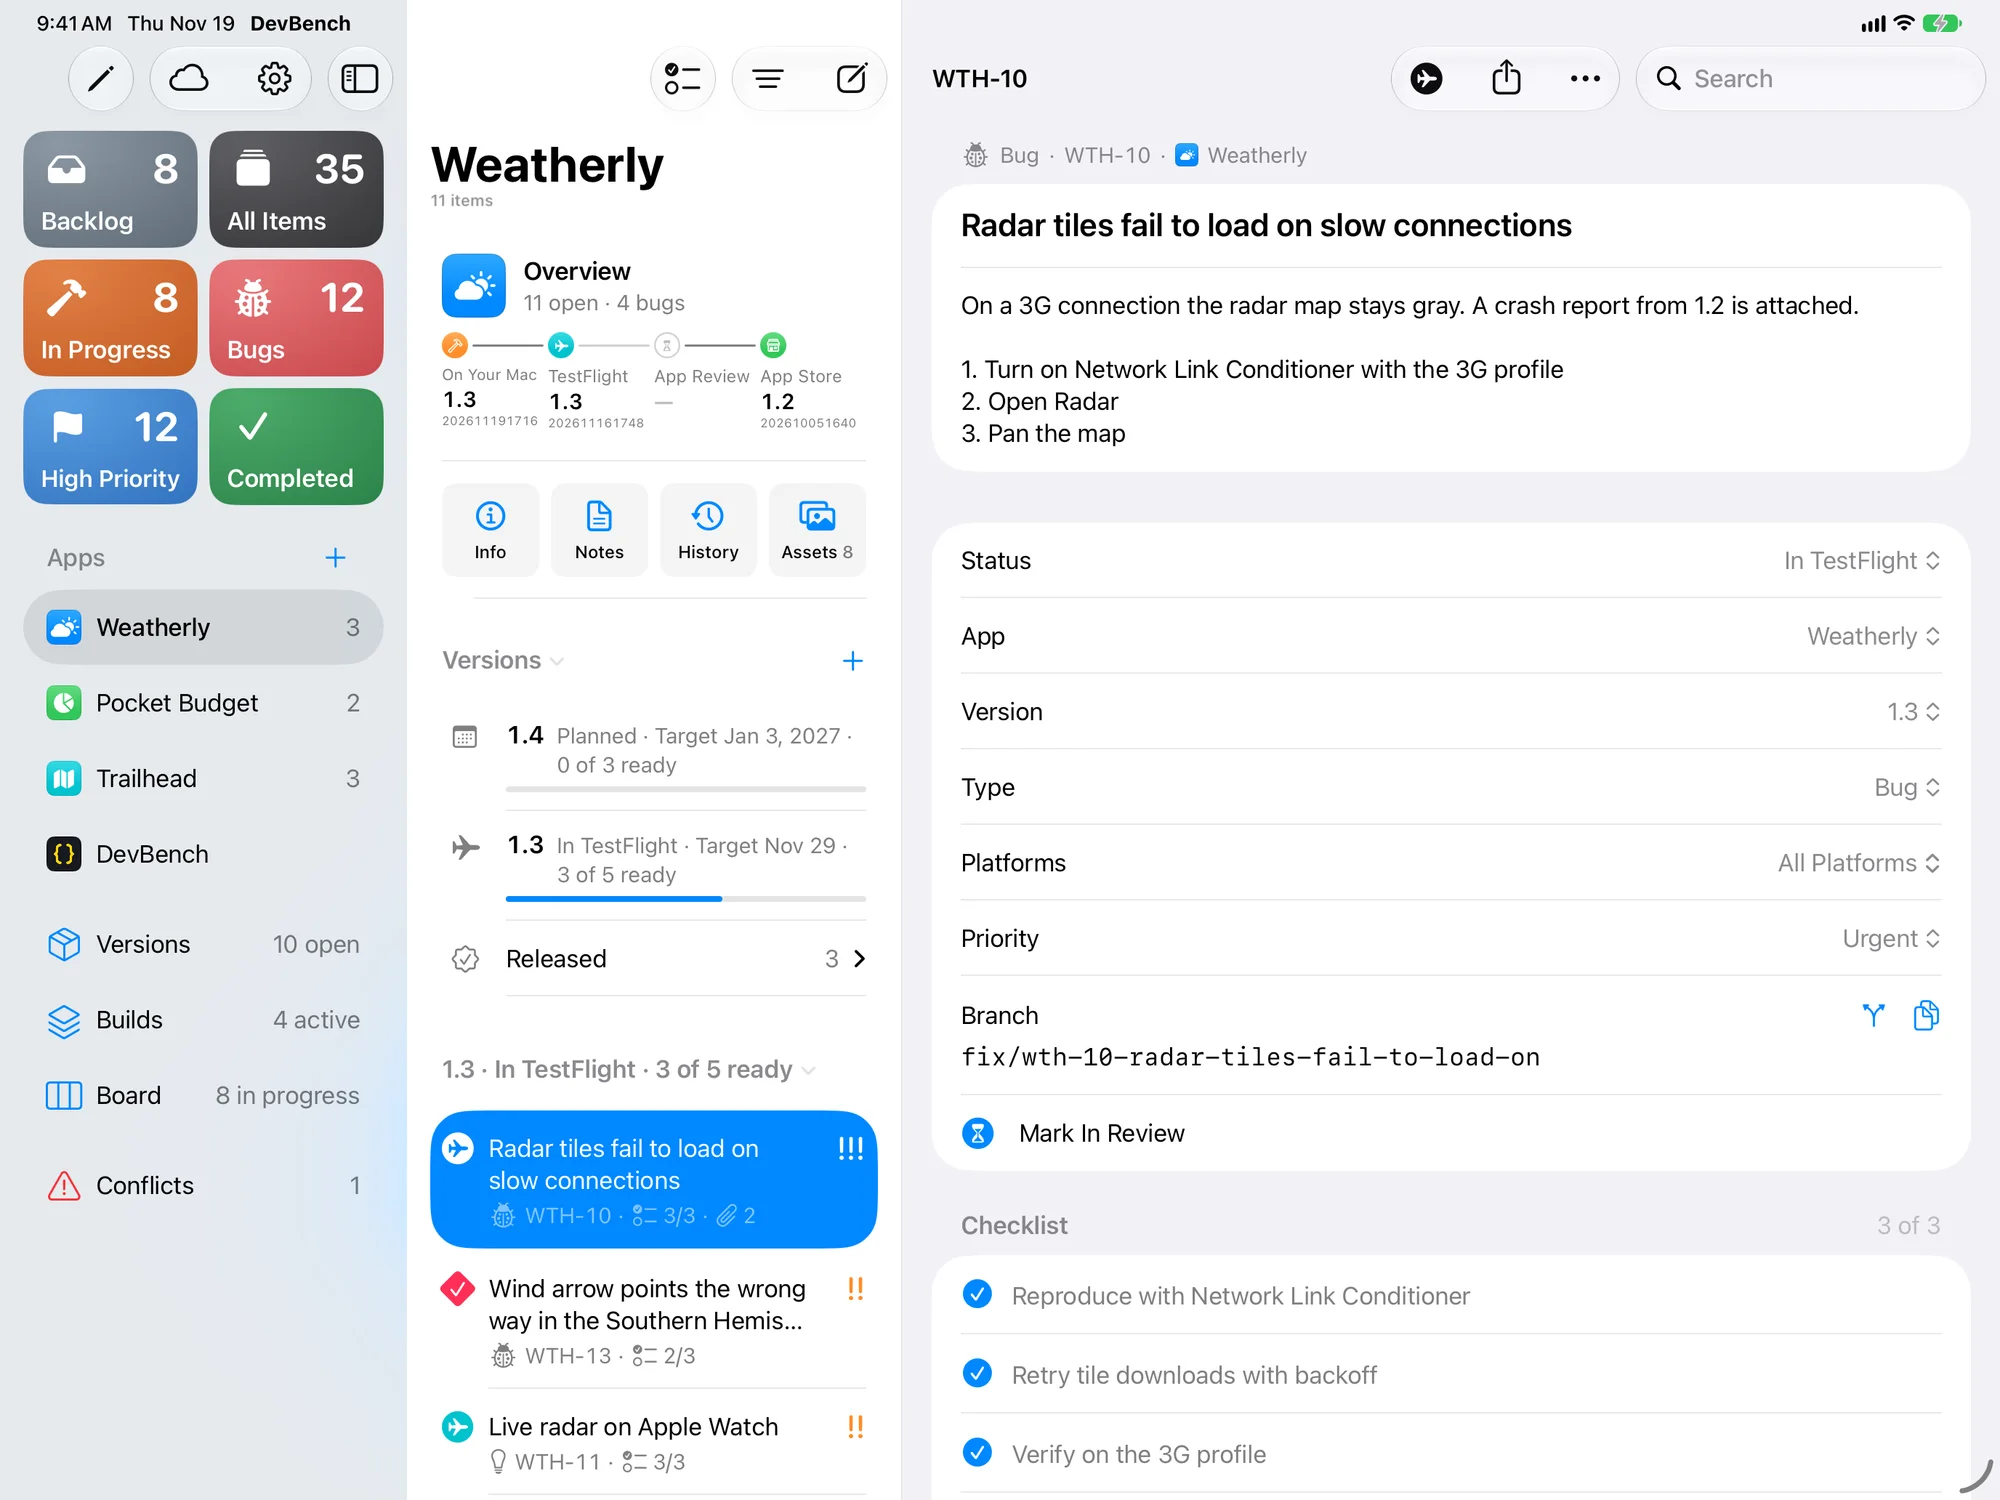
An item moves through nine statuses, from the backlog to the App Store. The Status menu shows what each one means.
- Not Started
- Captured. Nothing decided yet.
- Planned
- You intend to do it.
- In Development
- Being worked on.
- Testing
- Fixed or built. You’re checking it yourself. A coding agent that fixes an item moves it here.
- Staged for Release
- Checked, and waiting for a build. From here on, an item counts as ready for its version.
- In TestFlight
- In a build your testers have.
- In Review
- In a build that’s with App Review.
- Released
- Live on the App Store.
- Won’t Do
- Decided against.
- The In Progress list shows items that are In Development or Testing.
- You rarely set In TestFlight, In Review or Released yourself. From In TestFlight on, an item’s status follows its build when you send it to TestFlight, submit it or release it.
- Each status has its own color. Change them in Settings ▸ Status Colors (Settings ▸ General ▸ Status Colors on Mac), and choose Restore Standard Colors to go back.
Change an item’s status
- Open the item and choose its Status. Or, under Next Step, choose the button that moves it one step on, such as Mark Testing.
- In a list, swipe an item to the right to move it to its next status.
- On Mac and on iPad with a keyboard, press ⌥⌘] to advance the selected item, or ⌃⌘1 to ⌃⌘9 for a particular status.
- On the Board, drag a card to another column.
Priority
Priorities are None, Low, Medium, High and Urgent. High and Urgent items show in the High Priority list, and lists can sort by priority. On a keyboard, press ⌥⌘0 for None through ⌥⌘4 for Urgent.
An item’s details
Open an item to see and change everything about it.
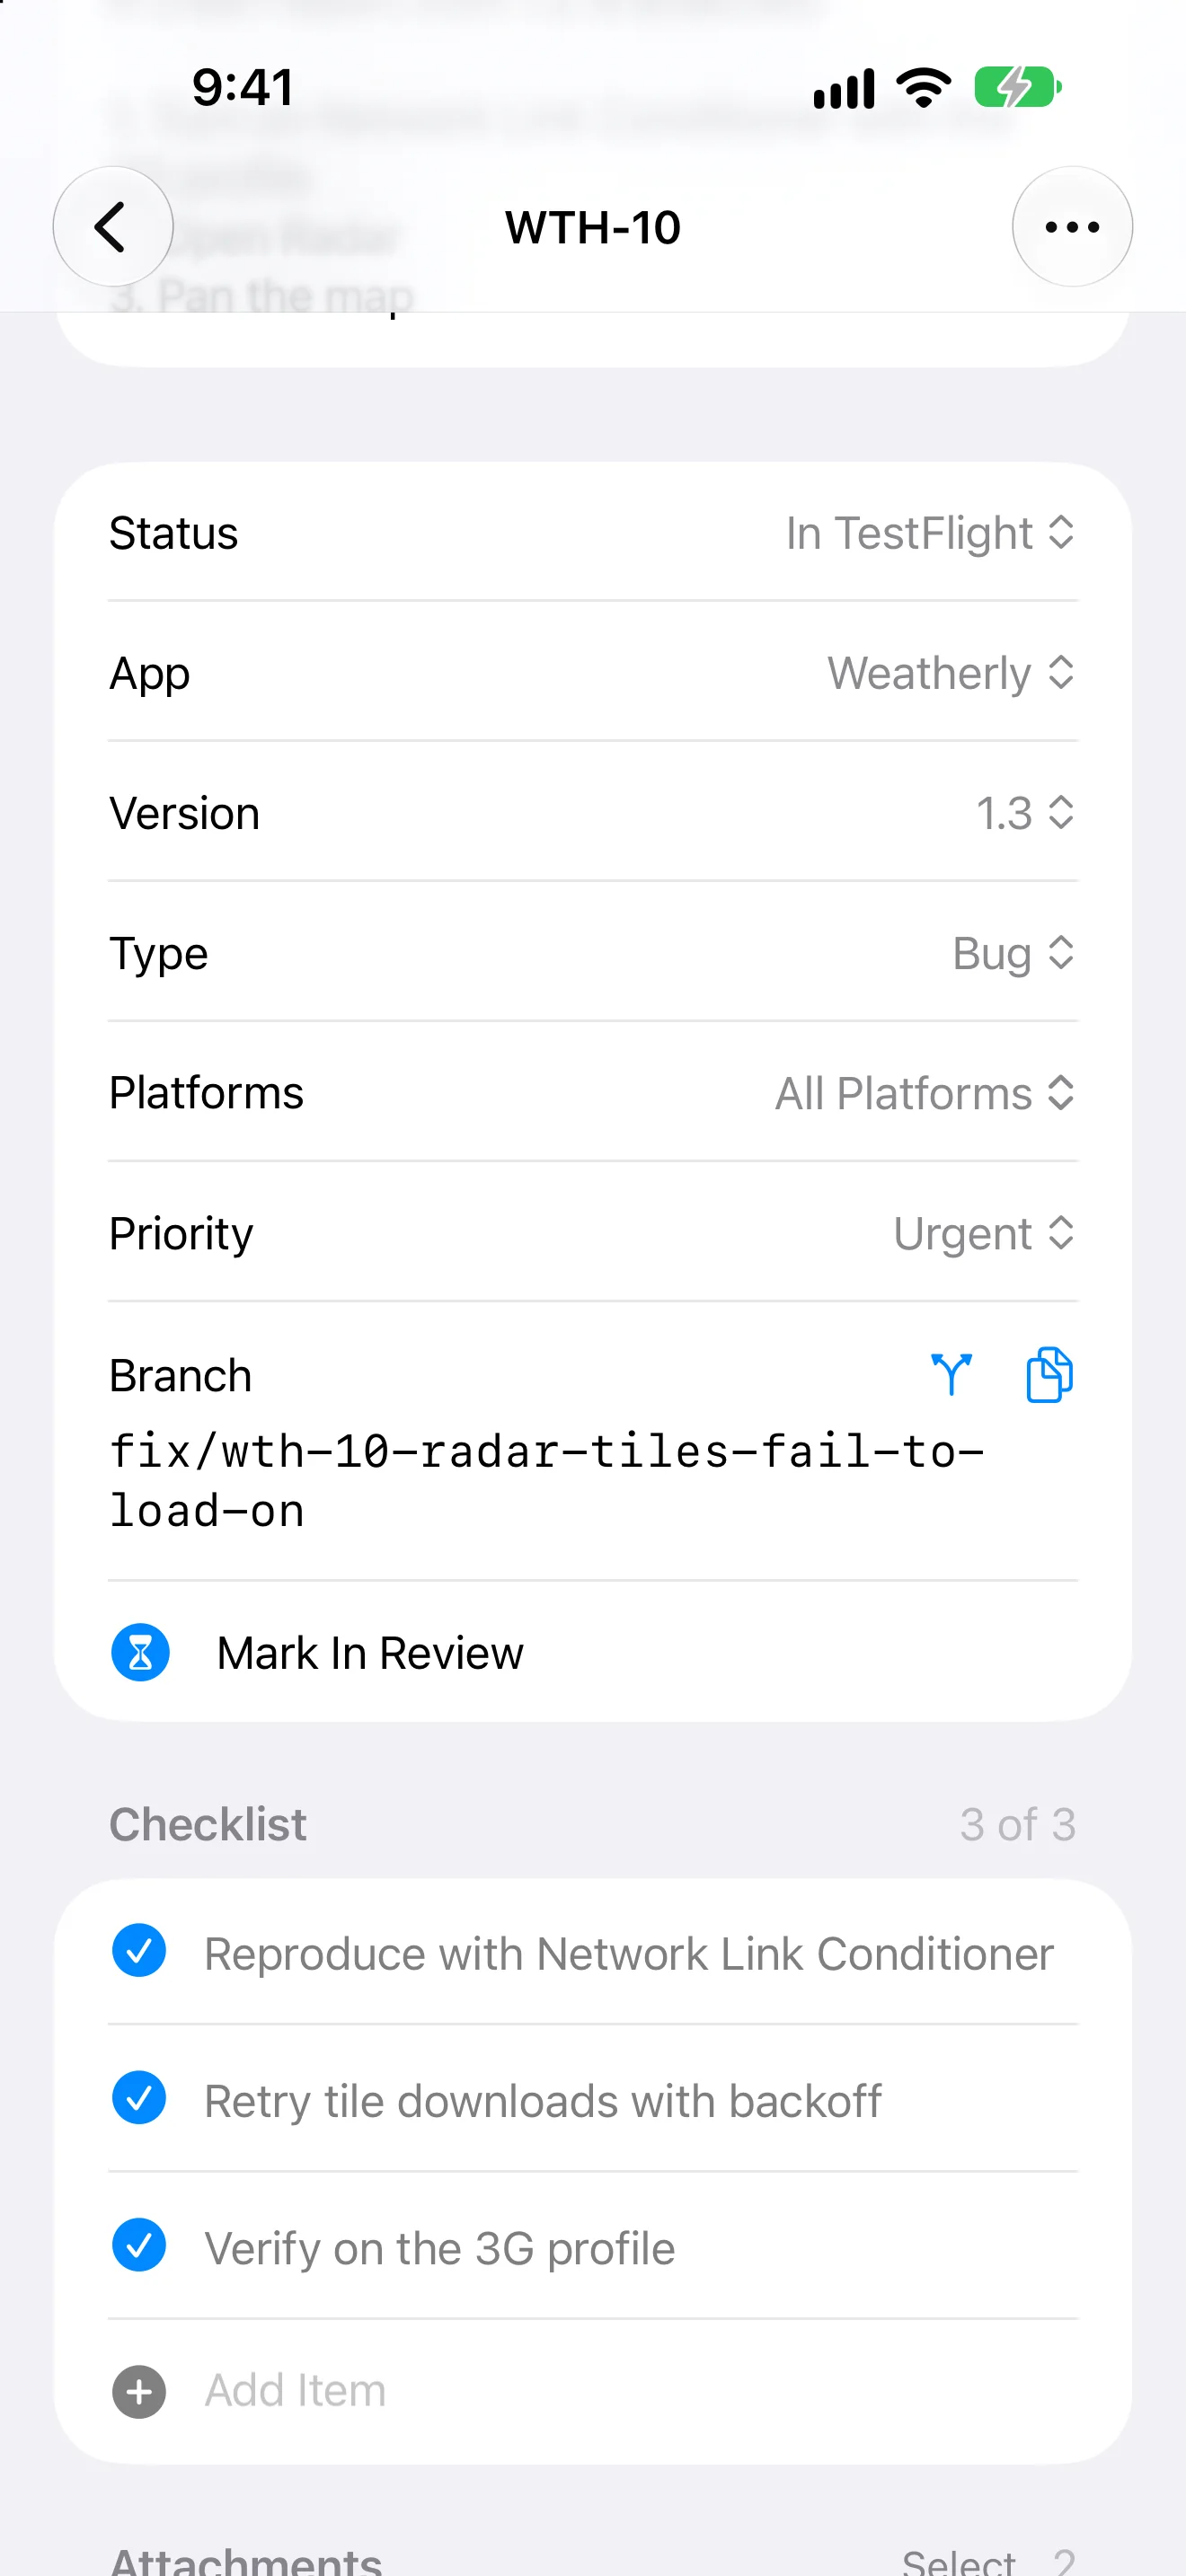
- Title and Notes
- What it is, and anything that helps: steps to reproduce, what you expected, links.
- Status, Priority, Type
- Where it stands, how much it matters and what kind of item it is.
- Platforms
- All Platforms, or only some of the platforms the app ships on.
- App
- The app the item belongs to.
- Version
- Backlog, a version, or New Version… to make one on the spot.
- Branch
- The git branch the work is on.
Checklists
Break an item into steps. Choose Add Item under Checklist, type a step, and check steps off as you go. Drag steps to reorder them. The list shows progress, such as 2/3, next to the item.
- An automation can add the same checklist to every new bug.
Attachments
Attach screenshots, screen recordings, crash logs and any other file.
- Drag files onto the item, or copy one and press ⇧⌘V.
- Choose Add Attachment, then Photos and Videos… or Choose File…
- Each file can be up to 250 MB. To attach a folder, compress it first.
- Touch and hold or Control-click an attachment to Quick Look it, edit its caption, save a copy or share it.
Branches
Give an item the name of the branch you’re working on. With a project folder linked, Branch Suggestions lists the repository’s own branches, plus a Suggested name built from your template. Copy Branch Name copies it in one click. DevBench suggests the name for you to copy; it doesn’t create the branch.
- Set the template in Settings ▸ General ▸ Branch Names. An automation can name the branch for you when work starts.
Release note
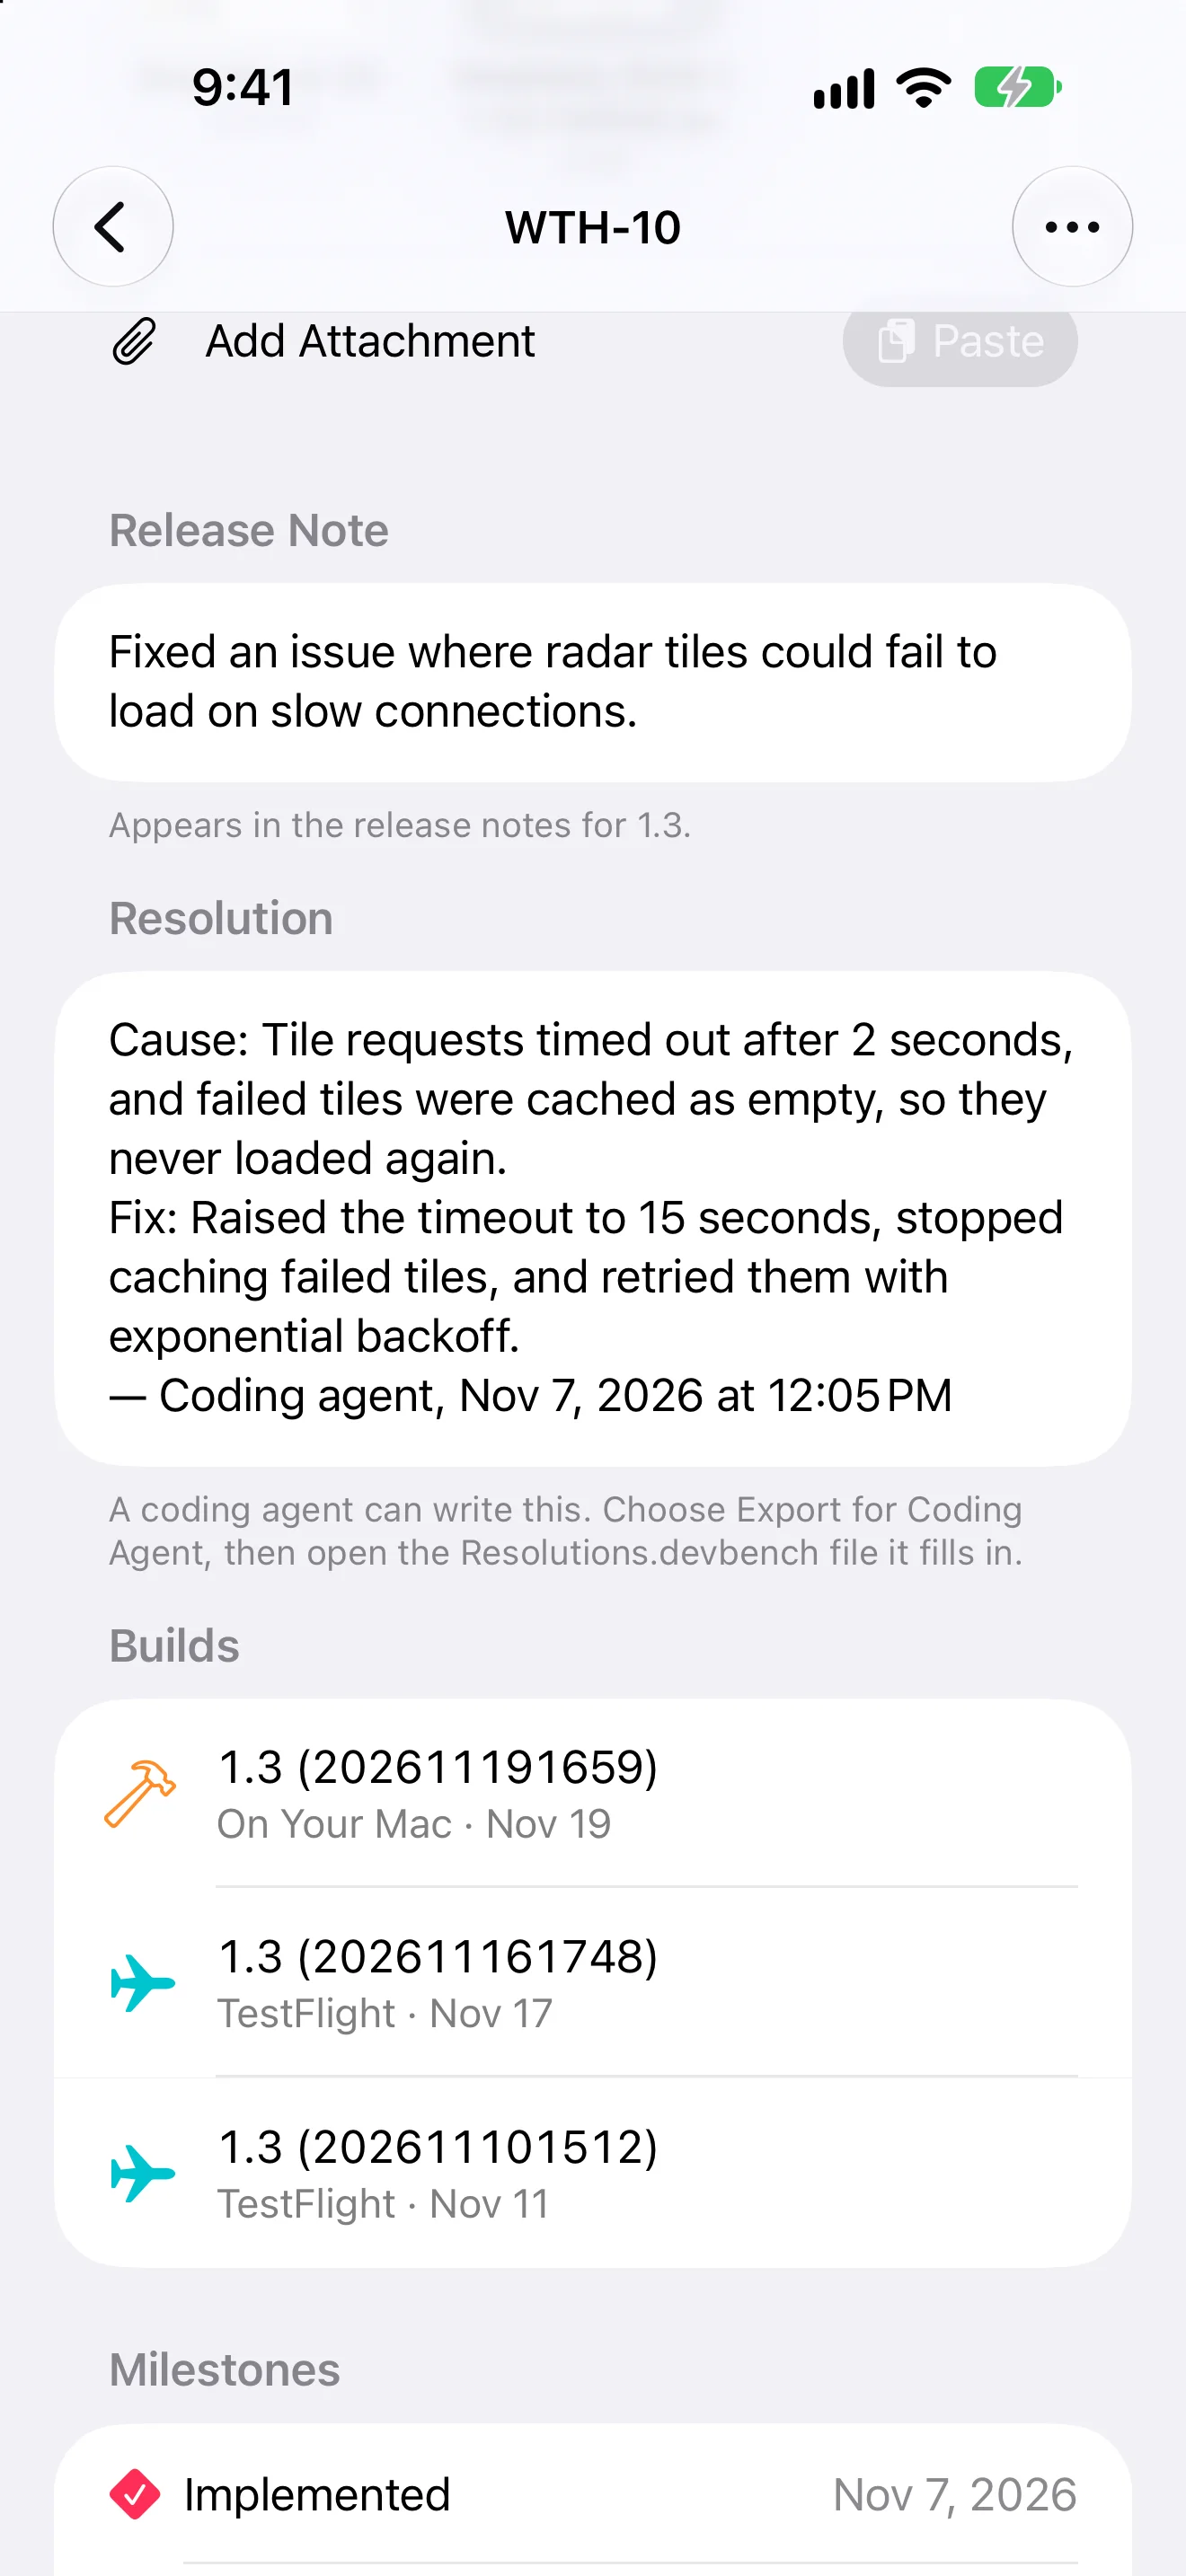
Once an item is planned for a version, it has a Release Note field: one line, written for the people who use your app. DevBench gathers these lines into the version’s release notes.
Resolution
The Resolution field records what caused a bug and how it was fixed. Type it in yourself, or let your coding agent write it, over MCP or through an export. An agent’s entries are signed with its name and the date, and later entries are added below earlier ones.
History
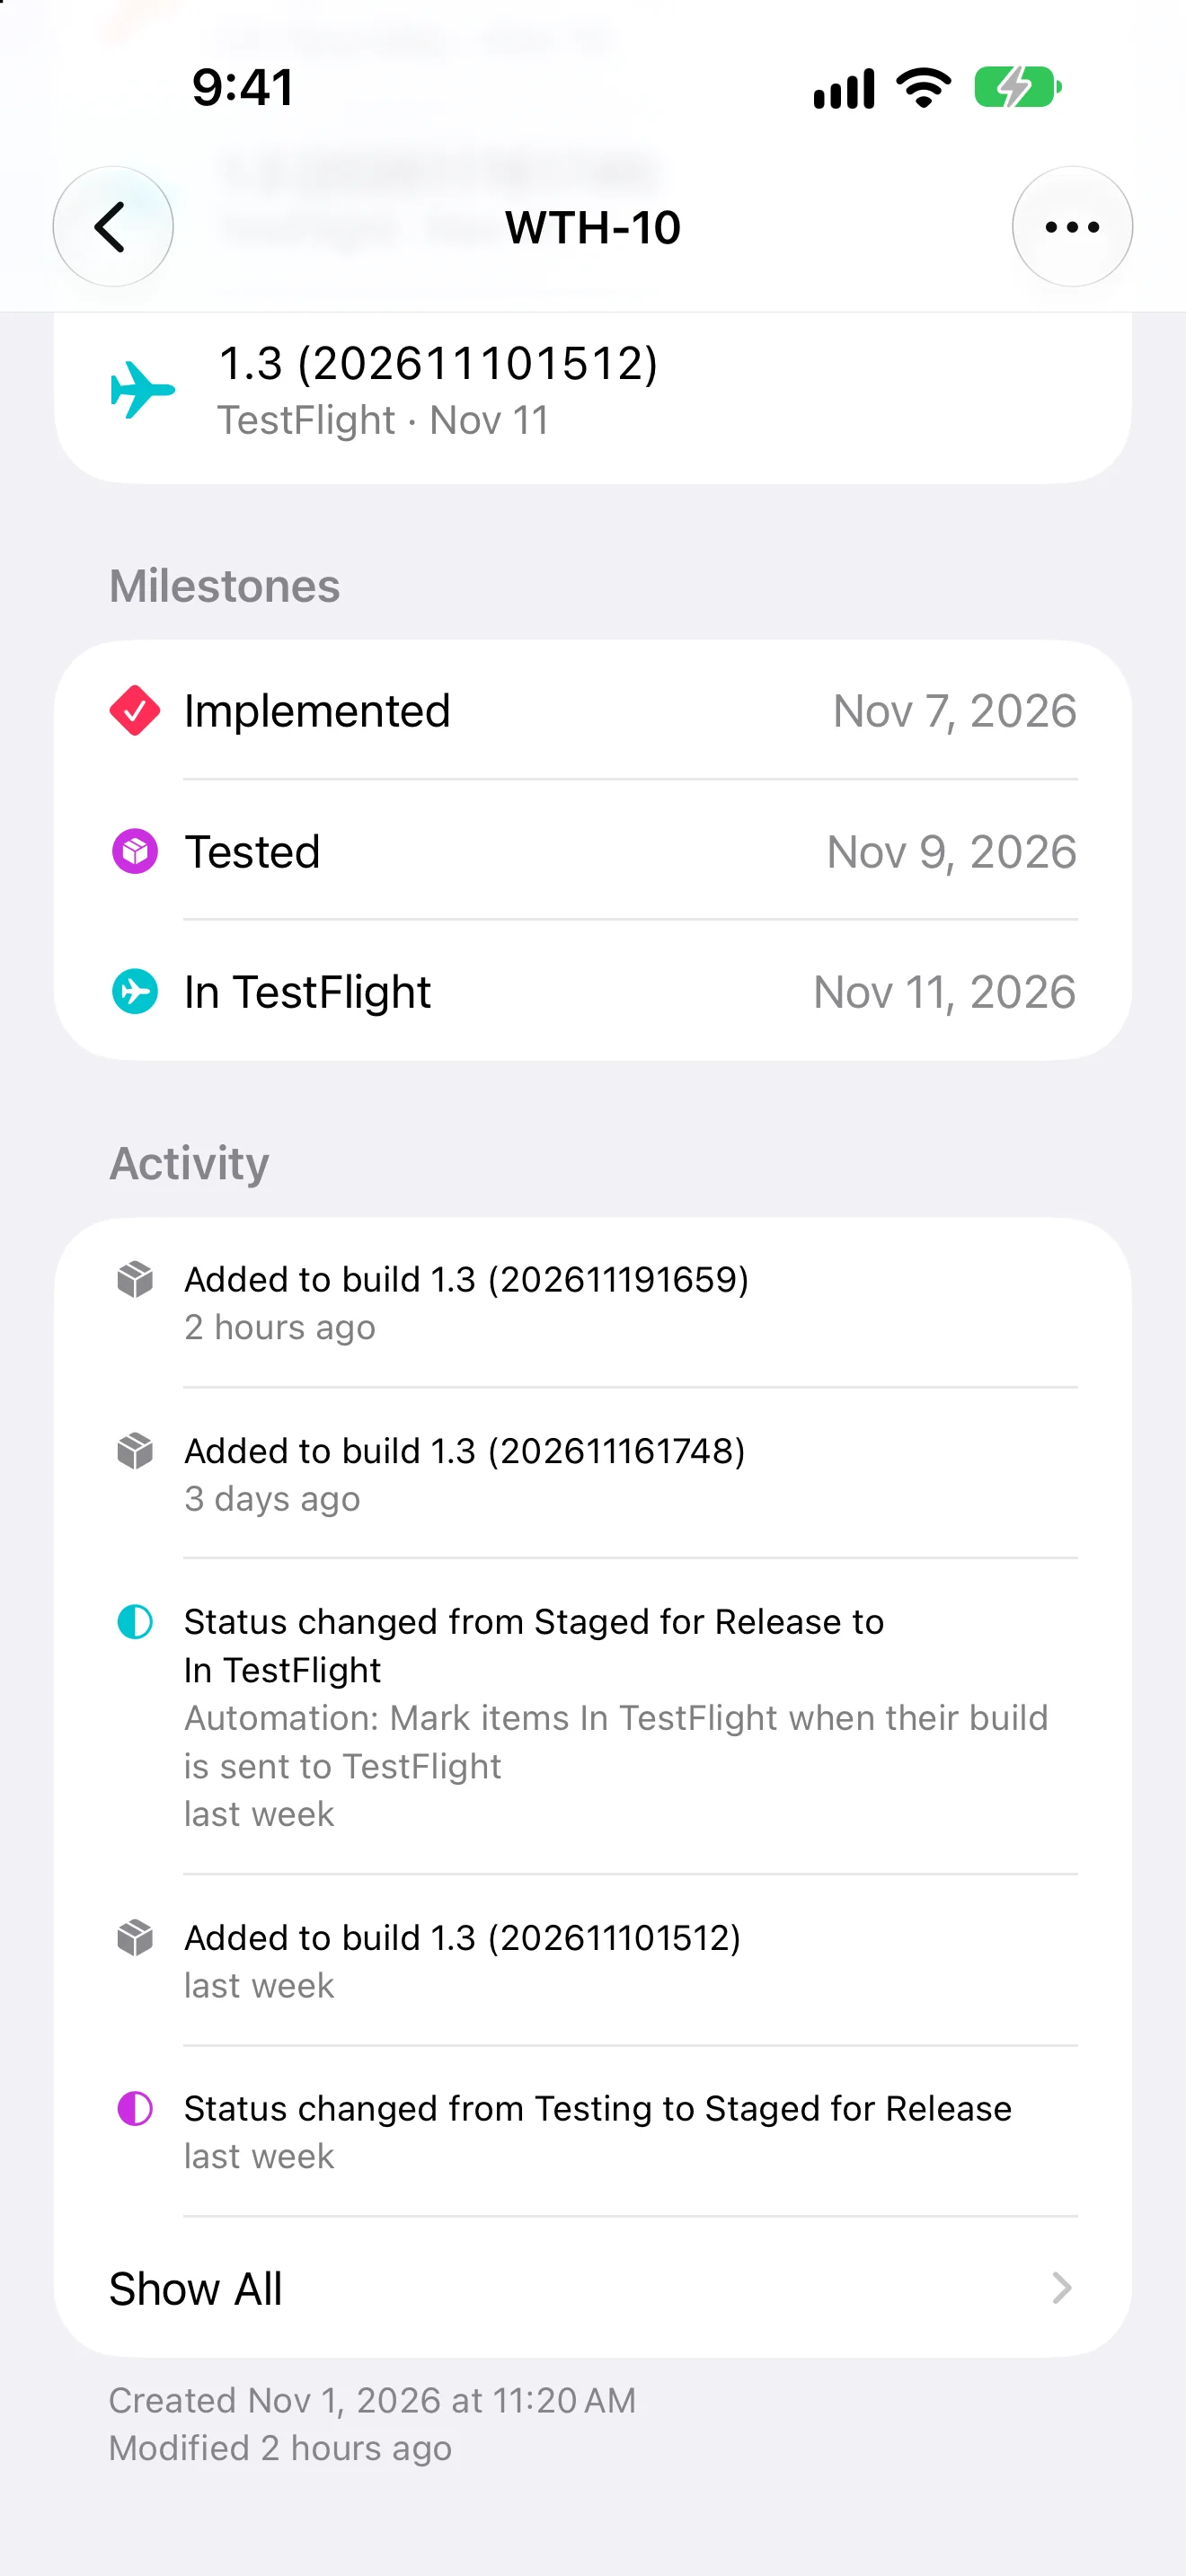
The end of an item shows where it has been.
- Builds
- Each build the item was in, and where that build is now.
- Milestones
- The dates it was Implemented, Tested, In TestFlight, In Review and Released.
- Activity
- Every change, with who made it: you, an automation or an agent.
IDs and links
Every item has an ID made of its app’s key and a number, such as WTH-12. Touch and hold or Control-click an item to Copy ID or Copy Link. The link opens the item in DevBench.
Duplicate, move or delete
- Duplicate (⌘D) makes a copy in the backlog as Not Started.
- Move to App sends the item to another app’s backlog. It gets a new ID there, and the old ID keeps working.
- Move to Recently Deleted (⌘⌫ on Mac, or swipe left) removes the item. You can recover it until it’s deleted permanently.
Released items are locked
Once an item is In Review or Released, it’s kept as it shipped, so the record stays true. To change one anyway, choose Edit on the item.